How To Tap Maple Trees For Beginners
Tapping maple trees to extract their sap is a practice that has been carried out for centuries, commonly known as maple sugaring. This activity is not only rewarding, but it also allows you to make your own maple syrup while connecting with nature. Learning to tap maple trees can be a fulfilling experience that lets you enjoy the process and reap the sweet rewards of homemade maple syrup.
In this beginner’s guide, we’ll walk you through the steps to tap maple trees successfully.
Disclaimer: This article includes affiliate links. If you click one of them, we may receive a small percentage of the sale at no extra cost to you. Thank you for your support!
How to Choose The Right Trees
Knowing what trees to tap is the first step before tapping trees. Sugar maples (Acer saccharum) are the preferred choice for tapping due to their high sugar content, but other maple varieties like red maples and black maples can also be tapped. Look for mature trees that are at least 10 inches in diameter.
A great way to identify trees is when there are leaves on them. For this reason, we recommend identifying maple trees during the fall months and marking them. This way you will know which trees to tap when the time comes.
How To Tap Maple Trees
Maple sap flows when daytime temperatures rise above freezing and nighttime temperatures drop below freezing. Typically, this occurs in late winter or early spring, usually between February and April, depending on your location. Monitor weather forecasts closely to determine the optimal time for tapping.
Equipment Needed
- Drill with a 7/16-inch drill bit
- Spiles or taps (metal or plastic)
- Collection buckets or bags
- Hammer or mallet
- Clean containers for boiling sap
- Filters or cheesecloth for straining sap
Step-By-Step Instructions
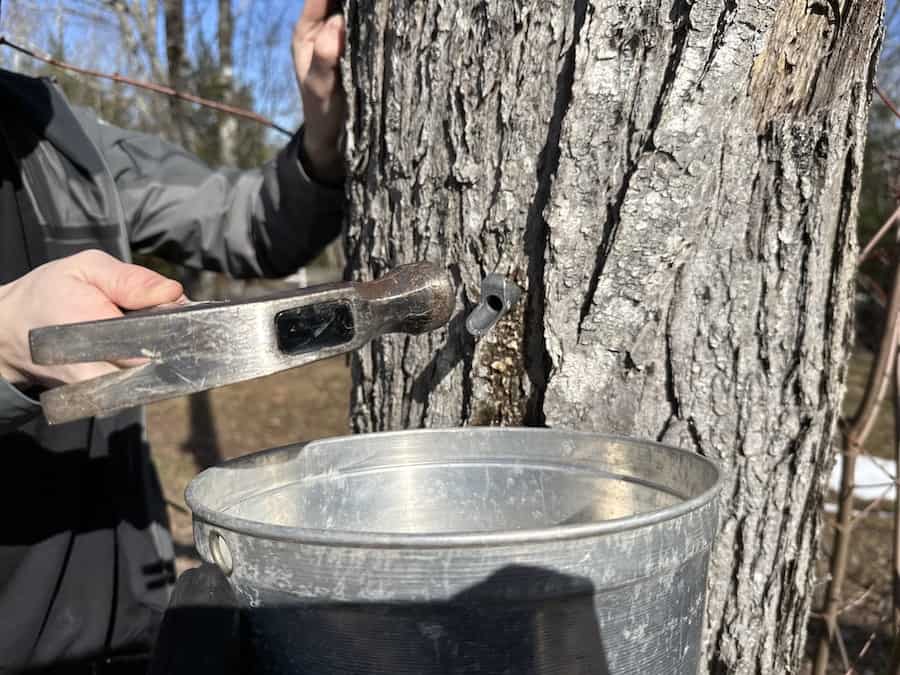
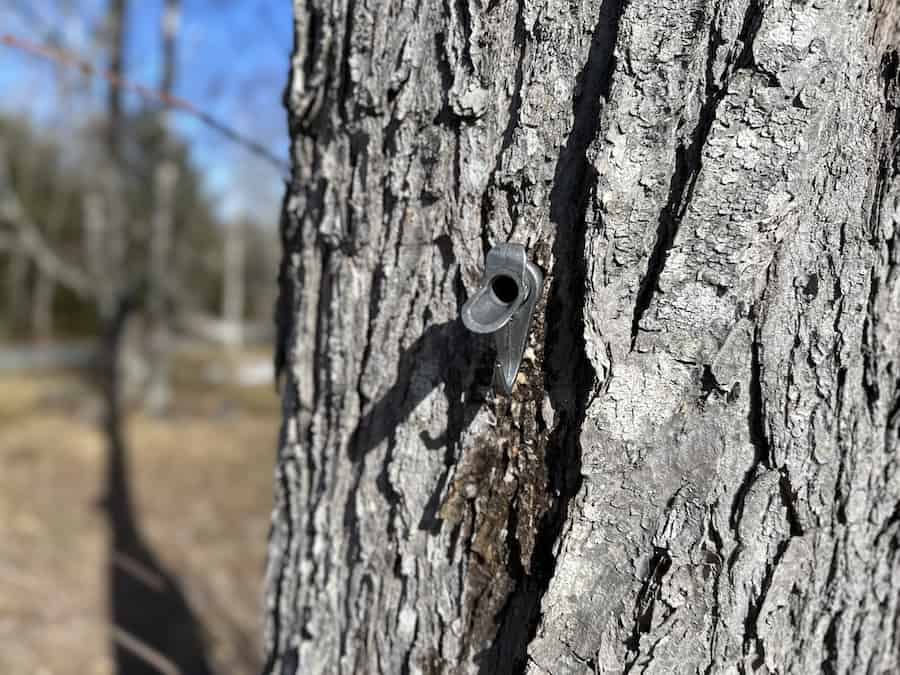
1. Begin by drilling a hole approximately 2 inches deep into the maple tree at a slight upward angle. Choose a spot on the trunk below any previous tap holes and about 3 feet above the ground.
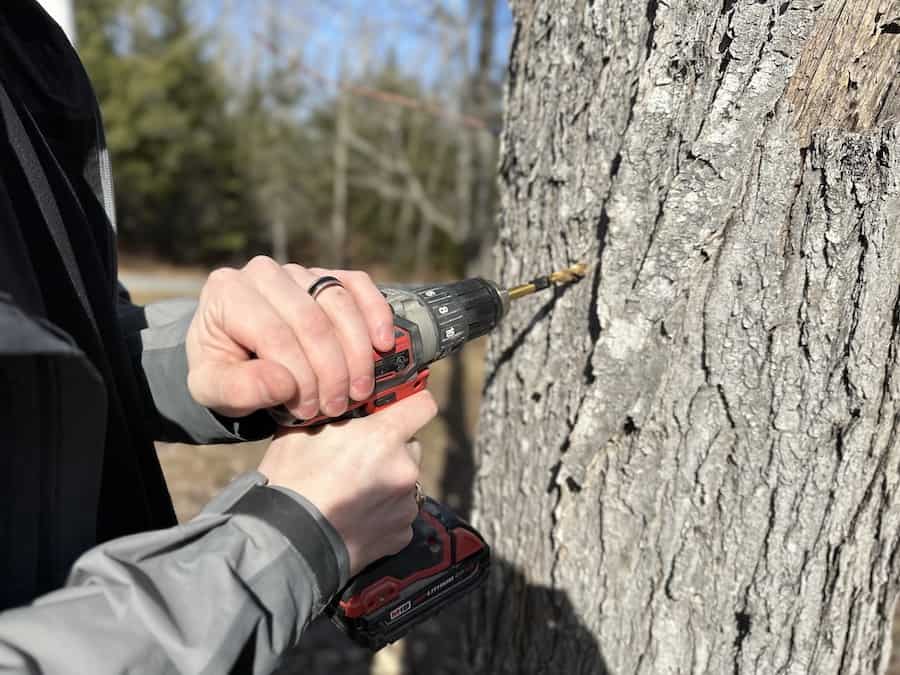
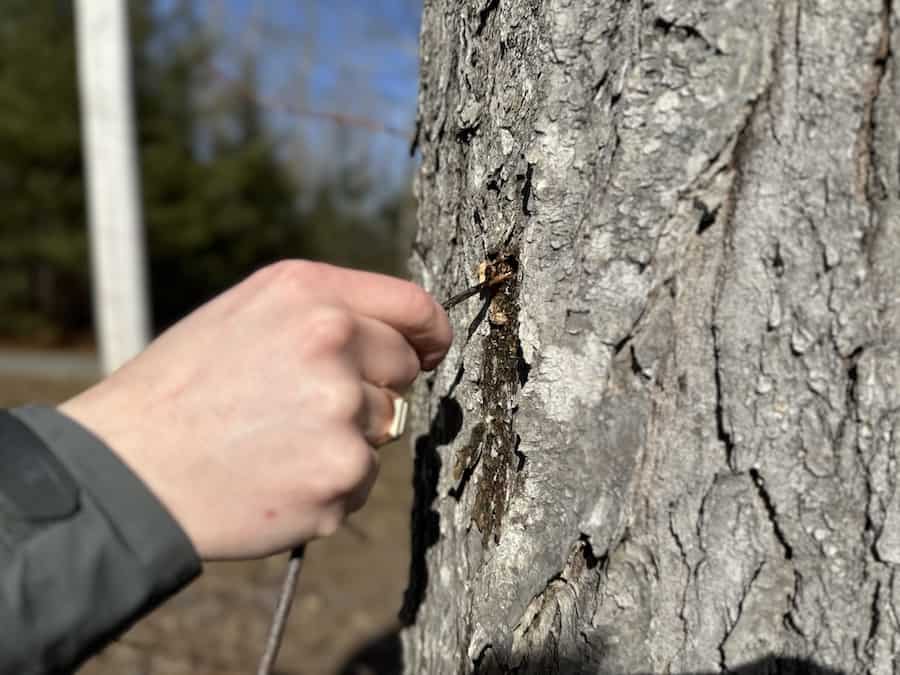
2. Clean out the hole with a tool or stick to remove any obstructions. Avoid blowing into the hole and be careful not to cause any damage to the tree.
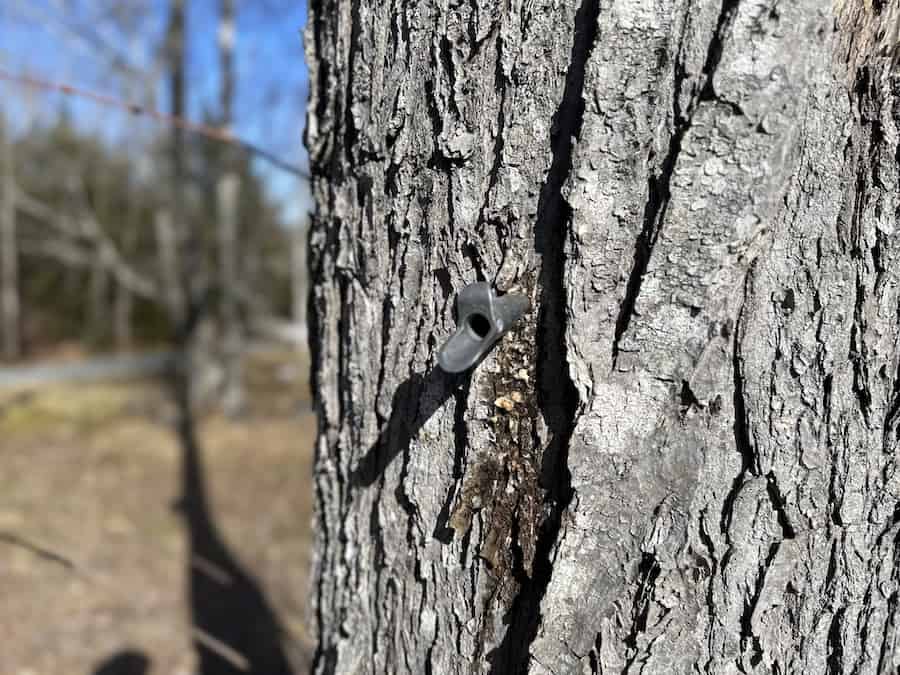
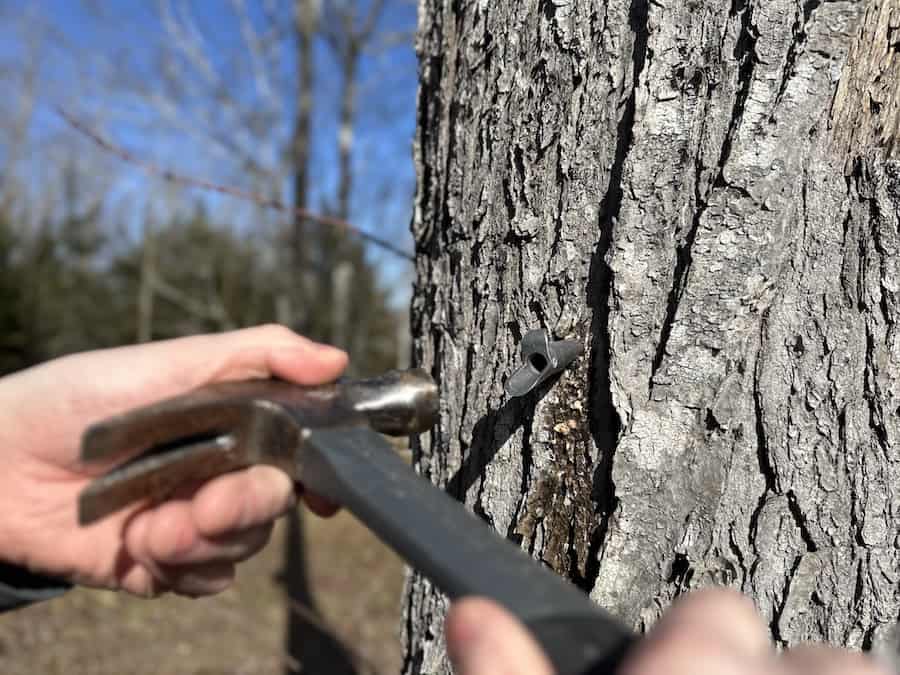
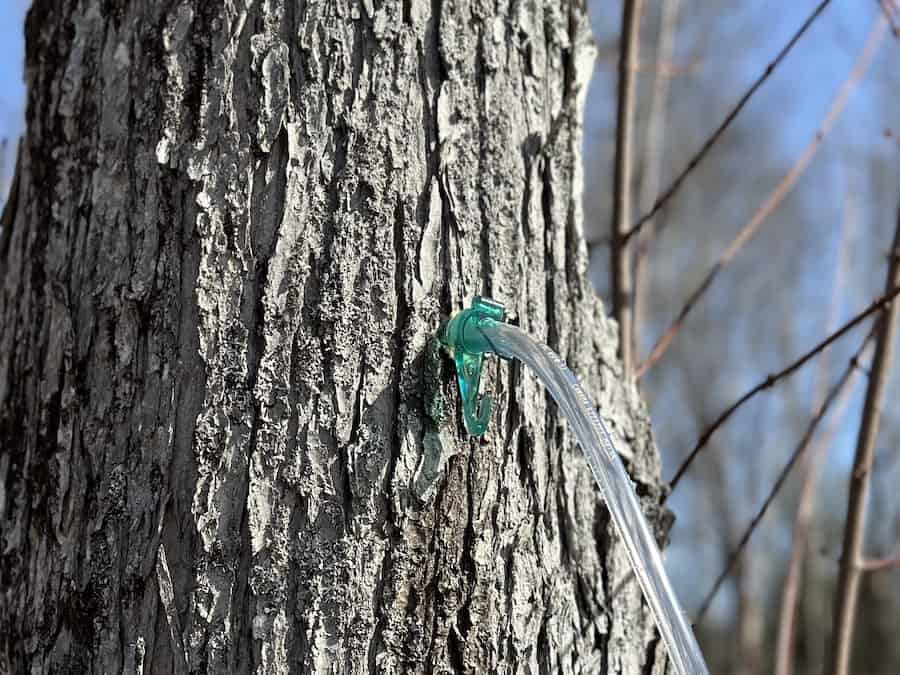
3. Next, insert the spile or tap into the hole using a hammer or mallet until it fits snugly. Sap may begin to trickle out during this step.
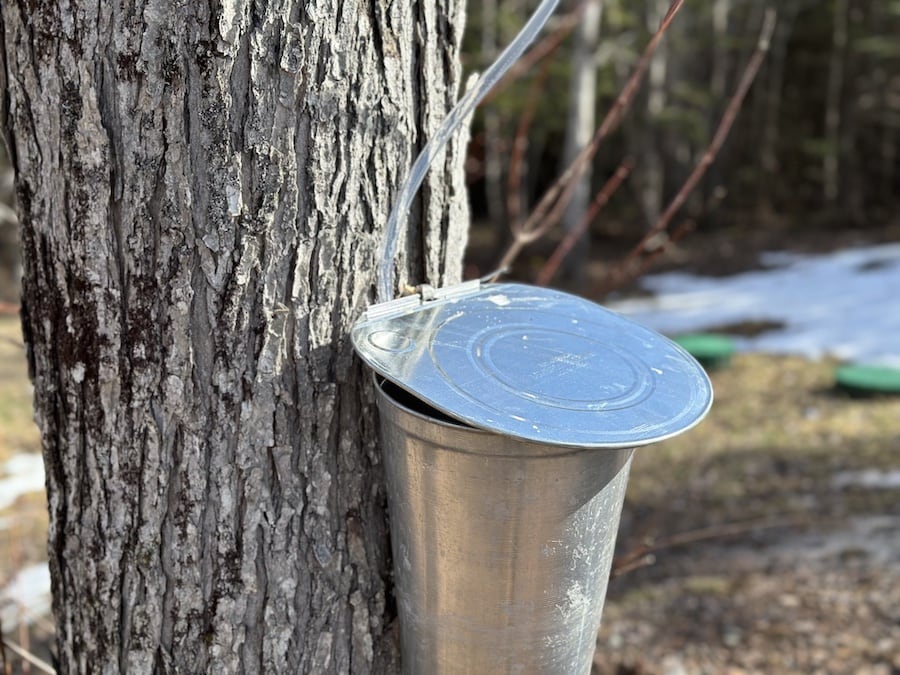
4. Hang a collection bucket or attach a collection bag to the spile to catch the dripping sap. Ensure that the container is clean and sanitized to maintain the quality of the sap.
In the photo below you’ll notice we have a clear tube going into our bucket. This is because we have two spiles tapped into one tree. Rather than using two buckets, we have a tube running sap from the top spile into the bucket. Meanwhile, the second spile flows directly into it.
5. Check the collection container regularly and empty it as needed to prevent overflow.
Once you’ve collected a sufficient amount of sap, strain it through a filter or cheesecloth to remove any debris or impurities. Transfer the filtered sap to clean containers and store it in a cool place until you’re ready to process it into maple syrup.
How To Boil Sap Into Syrup
Before you start boiling the sap, ensure you have a large, clean cooking vessel such as a stainless steel pan or an outdoor evaporator specifically designed for maple syrup production. It’s important to use a pot with a wide surface area to allow for efficient evaporation and reduce the risk of boiling over.
If you haven’t already, you will have to filter the sap through a fine mesh filter or cheesecloth to remove any remaining impurities. This will help produce a clearer and more flavourful syrup.
Transfer the filtered sap to your cooking container and place it over a heat source. This can be a stovetop burner or an outdoor fire. Begin heating the sap gradually, being careful not to let it boil too rapidly initially, as this can cause it to foam and potentially boil over.
As the sap heats up, it will gradually start to boil and release steam. Keep a close eye on the boiling process, adjusting the heat as needed to maintain a steady boil. Stir the sap occasionally to prevent it from sticking to the bottom of the pot and ensure even evaporation.
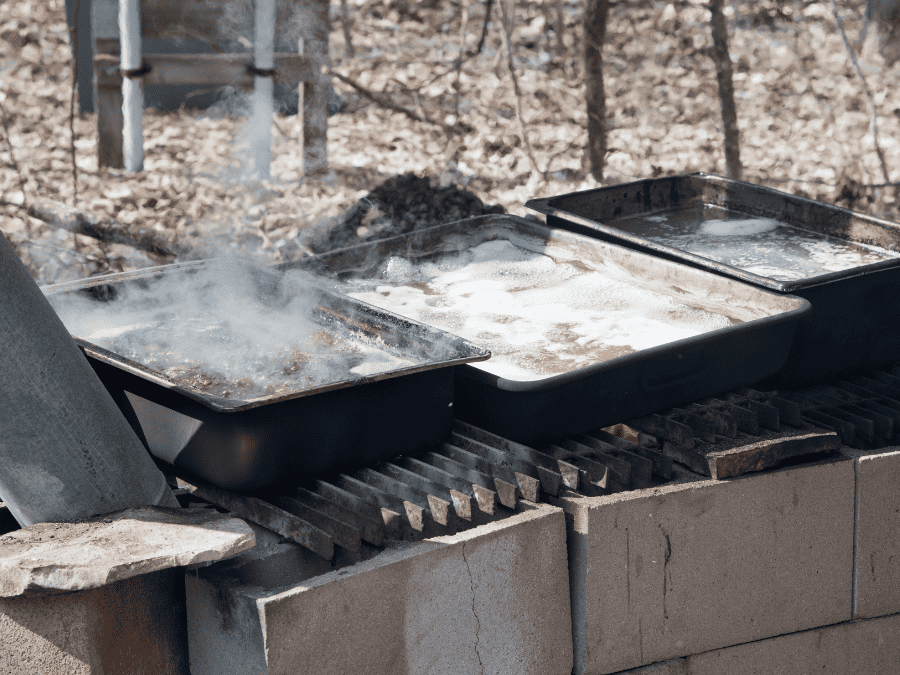
The goal of boiling the sap is to evaporate off the excess water, concentrating the sugars and flavours until the sap reaches the desired density for maple syrup. This process can take several hours, depending on factors such as the sugar content of the sap, the volume being boiled, and the intensity of the heat.
To determine when the sap has boiled down sufficiently to become syrup, you can use a candy thermometer to measure the temperature. Maple syrup is typically ready when it reaches a temperature of 219°F (104°C) at sea level, or 7°F (4°C) above the boiling point of water.
Once the sap has reached the proper temperature, remove it from the heat and allow it to cool slightly. Carefully pour the syrup into clean, sterilized glass bottles or jars, leaving a small headspace to allow for expansion. Seal the containers tightly with lids to preserve the freshness and flavour of the syrup.
What Type Of Spiles Should You Use?
Spiles, also known as taps, are small, hollow tubes or spikes inserted into trees to collect sap for making syrup. These devices serve as conduits through which sap flows from the tree into collection containers. Spiles are typically made of either metal or plastic and are designed to be inserted into pre-drilled holes in the maple tree’s trunk.
When it comes to choosing between metal or plastic spiles or taps for tapping maple trees, both options have their pros and cons, and the decision often depends on personal preference and specific circumstances. Here’s a breakdown of the pros and cons of each type.
Pros & Cons Of Metal Spiles
Pros & Cons Of Plastic Spiles
What To Do If Sap Isn’t Flowing
After tapping your trees, you may run into the issue of sap not flowing. If the sap doesn’t flow from your tapped tree, there are several potential reasons and corresponding actions you can take to troubleshoot the issue. Here are a few common reasons why sap might not be flowing.
The Weather
Sap flow is dependent on temperature fluctuations, with freezing nights and warmer days typically triggering sap flow. If the weather has been consistently cold or if temperatures haven’t fluctuated as expected, it may delay or inhibit sap flow. Monitor the weather forecast and be patient, as sap flow can vary from year to year and even within the same season.
Check Your Tree Health
Inspect the health of the trees you’ve tapped. If a tree is stressed, diseased, or damaged, it may produce less sap or no sap at all. Look for signs of damage, such as cracks in the bark, dead branches, or insect infestations. If you suspect a tree is unhealthy, consider tapping a different tree or consulting an arborist for advice on tree care.
Tap Placement
Ensure that your spiles are properly installed in the trees. The tap hole should be drilled at a slight upward angle and reach into the sapwood layer of the tree. If the tap hole is too shallow or too deep, it may not effectively access the sap flow. Re-evaluate your tap placement and make any necessary adjustments.
Obstructions
Sometimes, sap flow can be obstructed by debris, such as wood chips or bark, inside the tap hole. Use a small tool, stick or wire to carefully clear any obstructions from the tap hole without causing damage to the tree. This can help restore sap flow if it has been impeded.
Be Patient
Sap flow can be unpredictable, and trees may take time to start producing sap. Monitor your tapped trees regularly and be patient as you wait for sap flow to begin. Sap flow can vary from tree to tree and from season to season, so persistence is key.