How To Build A Hingeless Chicken Door For A Coop

As part of turning one of our outbuildings (an old woodworking shop) into a chicken coop/gardening shed, we had to install a chicken door. I decided on a hingeless design to make things easier, as I wasn’t prepared to reframe any part of the wall.
How can I install a hingeless chicken door in my coop? Cut a rectangular hole in the wall (9-12″ wide by 10-14″ high) between two studs. Cut a plywood door piece to be larger than your hole (2″ to either side and taller) and build a slotting system on the wall’s exterior for the door to slide into. Create a pulley system to open/close the door.
In this article, we’ll break down the quick answer written above and explain how we decided to create the chicken door in our very own coop.
Note that if you’re used to reading Julia’s writing here at HomesteadFox, you’ll be reading my (Arthur’s) writing for this one. I’m no more than a hobbyist carpenter (though I worked as a civil technician designing truss systems in a past career). I like to keep things simple, so if that’s your style, I think I can help you with your chicken door!
Disclaimer: This article includes affiliate links. If you click one of them, we may receive a small percentage of the sale at no extra cost to you. Thank you for your support!
Related Homestead Fox Articles:
Related Homestead Fox Articles:
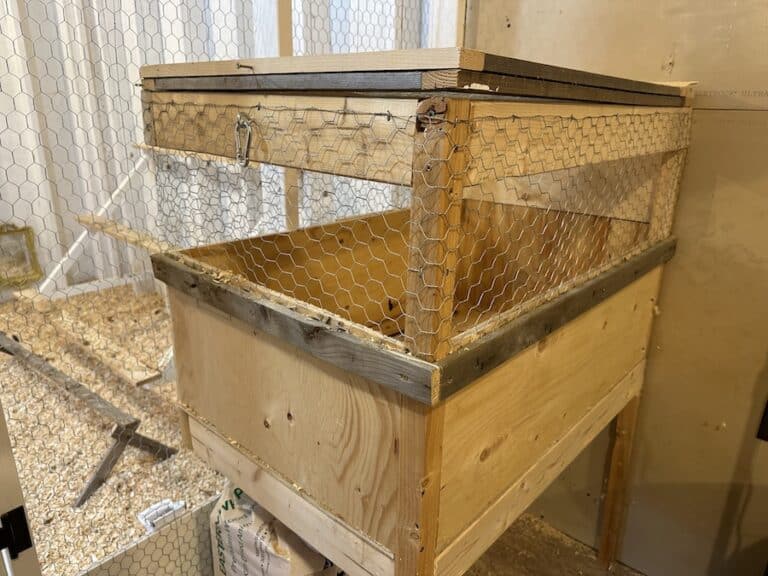
• How To Build Roosting Bars In A Chicken Coop
• How To Build Nesting Boxes For A Chicken Coop
• How To Add Ventilation To A Chicken Coop
How Big Should A Chicken Door Be?
The size of your chicken door opening largely depends on the chicken breed within the coop. For example, Jersey Giants would require a larger door than Silkies.
That being said, a good rule of thumb is to build the door large enough for a single chicken to pass through without issue. This often means between 9-12″ wide and 10-14″ tall. We decided on 10 1/4″ wide by 12″ tall for ours (we have Rhode Island Reds and Ameraucanas). But, if you’re only planning on only keeping hens of small to medium-sized breeds, a 9″ x 10″ door opening will often be sufficient.
As an aside, if we ever are to get ducks (and put them in the same coop as the chickens), I’d likely have to redesign the door and make it larger. That is to state that I’d recommend thinking of future-proofing when it comes to designing your door.
Now, the size of the actual door itself is often larger than the hole, especially in sliding designs (and even in hinged designs). In most cases, I’d recommend the door have at least an inch overlap beyond the door opening. That way, it will be sure to cover the entrance to the coop, helping to keep predators out.
What Supplies You’ll Need
As with most chicken coop designs, there are a wide variety of strategies when it comes to adding a chicken door. For instance, you could opt to purchase a pre-fabricated automatic door that connects to wifi for remote control. Alternatively, you could build a manual hinged or sliding door, with or without a ramp, with inside and/or outside opening access.
There are virtually endless options here, and I opted for a vertical sliding door that opened and locked from the outside, complete with a permanent ramp to the run.
Here’s what I used (I’ll add links to the supplies/tools I used). Note that I converted an old woodworking shed into a garden shed/chicken coop, so the structure was already there. I’ll also add my commentary on what I would use instead, having now completed the project.
Tools and supplies for the door (I’ll add my exact dimensions for the single piece of plywood and 2×4 — yours may be different):
- Circular saw (with higher tooth-count blade if cutting through siding or shingles)
- Wood screws (#8 – 1 1/4″, 2″ and 3″)
- Power drill with appropriate driver and drill bits
- 1 – 1×4 x 8′
- 1 – 1/2″ plywood 12 1/4″ x 24″
- 1 – 2×4 x 19 1/4″
- 2 – Carabiners
- 4 – Eye hooks
- Rope (10′ should be plenty)
- Handsaw
- Tape measure
- Pencil
Optional supplies for the ramp (I’ll add my exact dimensions for the plywood once again):
- 1/2″ plywood 19 1/4″ x 35″
- 2 – 1×2 x 6′
As for the circular saw blade, I had the choice (at my local hardware store) between a 48 and a 140-tooth blade. Since I didn’t want to chew up the siding, I opted for the 140-tooth blade (rated for plastic, vinyl and plywood). After some frustration cutting through the plywood, I ultimately had to finish the cuts using a coarse handsaw. Knowing what I know now, I would have chosen the 48-tooth or looked harder for a 60-tooth blade.
What’s more, if you have a table saw, I would use that over the circular saw to cut the door and the ramp. I’d also likely opt for a reciprocating saw to cut through the wall of the coop, especially near the corners (versus the circular and hand saw combination).
I’ll note here as well that there’s nearly a 21″ drop from the bottom of the door opening to the bottom of the run, which prompted me to install the ramp.
How To Install A Manual Chicken Door In Your Coop
Now, I’ll share how I installed the chicken door in my coop. Before getting into the details, here’s the interior of the workshop that I started with (this photo was taken just after removing the drywall, vapour barrier and insulation — the electrical sockets are turned off at the breaker box).
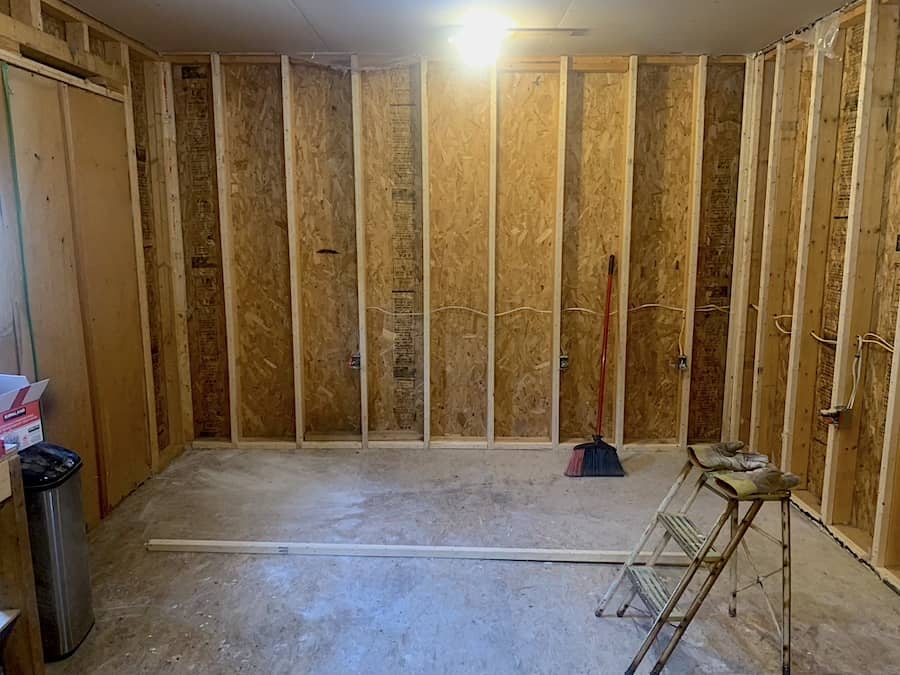
We had decided that we wanted the chicken door on the side of the building (the garden is in the front) but near the front of the building at the left corner. From the photo above, this translates to the left side of the wall in full frame and, more specifically, between the second and third studs from the left (the space before the first socket).
Deciding to put the door in this location meant removing the sockets could wait on the list of tasks required to transform our work shed into a chicken coop.
I measured and marked the centre line between the two studs, drawing a vertical line from the bottom of the frame up past where I’d be making the top of the door. It’s important when using a circular saw to cut through a wall (the saw doesn’t start at the edge of the material but rather the top) to extend the lines beyond where you’ll be cutting in order to help guide the saw in a straight line.
From the centre line, I measured and marked a vertical line 5 1/8″ to the left and 5 1/8″ to the right. I double-checked the distance between each of these lines and their closest stud to ensure I had the 10 1/4″ width centred between the studs. I then measured and marked a horizontal line 12″ above the top of the bottom 2×4 of the frame. I would be making my cuts at these lines.
I started with the right vertical line (the form factor of the circular saw wouldn’t allow me to cut the “right way” since the base plate came into contact with the stud before the wall). I carefully positioned my circular saw to cut at the right vertical line and cut as much as I could. I got close to the top horizontal line (without being able to see exactly) and as close as I could to the bottom of the frame due to form factor limitations. It’s for these reasons that I’d recommend a reciprocation saw for this job!
The second cut I made was at the left vertical line, which was much more difficult. I essentially did the same thing, only with the circular saw “upside-down”. Again, I got as close to the horizontal lines as I felt I could safely (without cutting past them).
The third cut was the top horizontal line. After that cut, the two resulting corners were still fully intact. I would have to carefully cut the corners out with a straight saw (at the time, that meant a handsaw, though again, a reciprocating saw would have been preferred).
I couldn’t make the fourth and final cut from the inside since it was to be flush with the top of the bottom 2×4 of the framing, so I made my way outside. Measuring 12″ below the top cut, I marked a horizontal line on the exterior siding, lined up my circular saw, and made the cut as straight and close to the vertical edges as I could.
From there, I had to finish the cut with my handsaw, which wasn’t ideal, but it actually didn’t chew up the siding as much as I thought it would. I cleaned up the corners with my chisel.
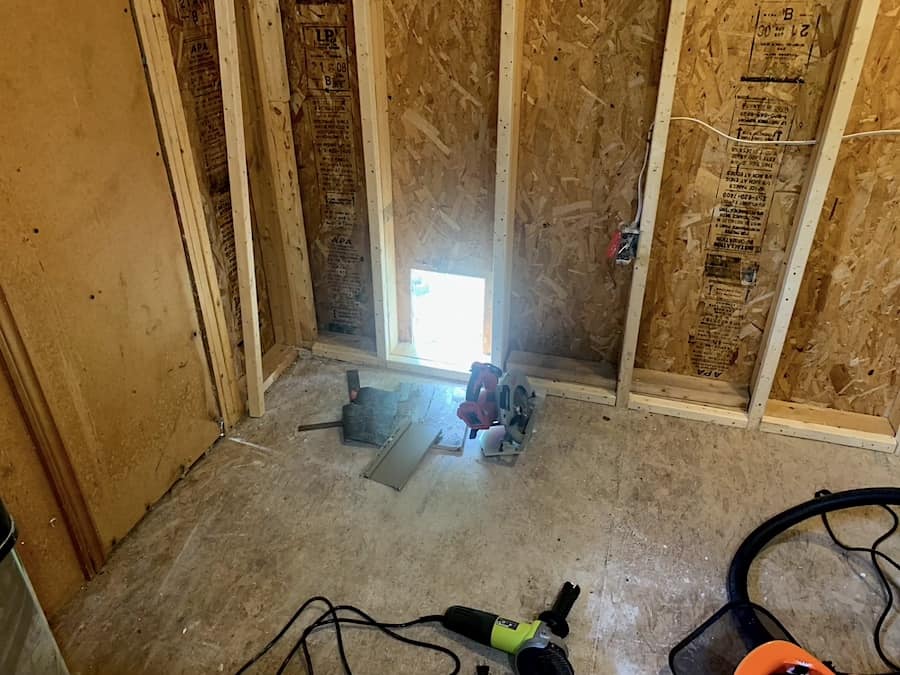
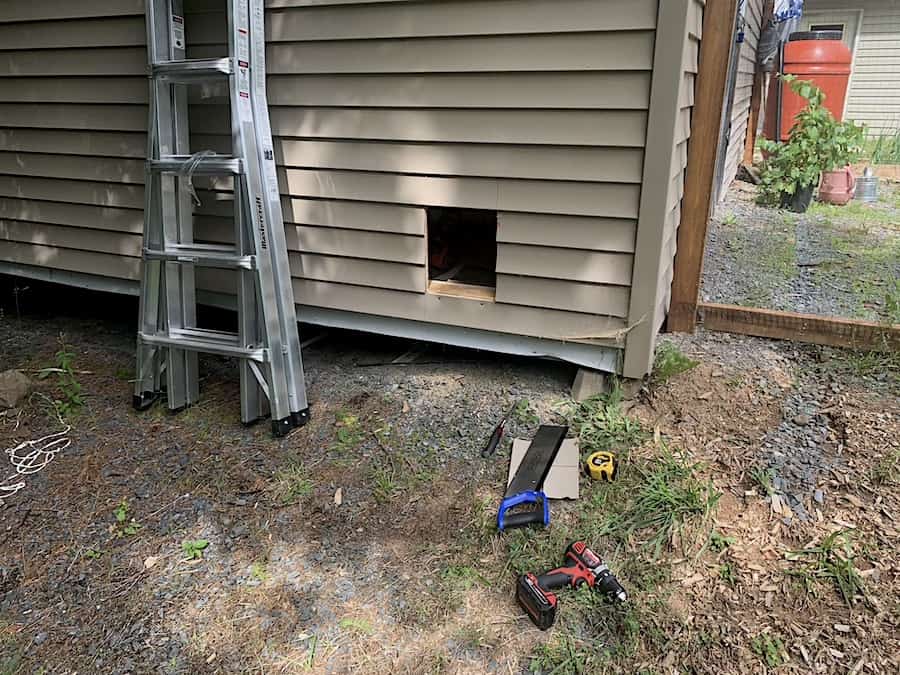
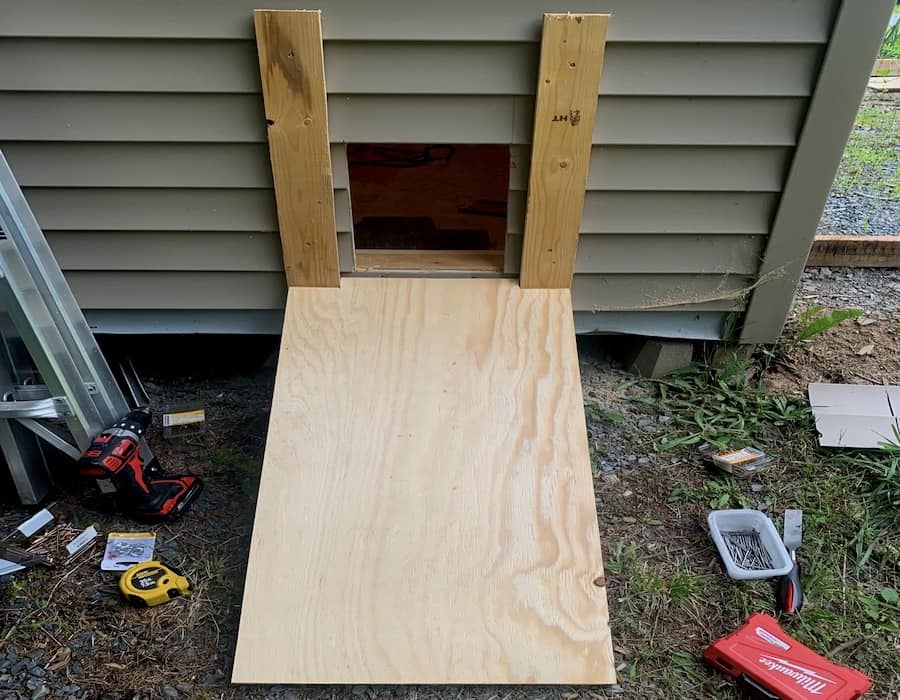
Here are photos from the interior and the exterior of the coop, showing the freshly cut door opening:
Moving on, we decided to build the door 12 1/4″ wide to have an inch to either side of the hole. This helps ensure the door covers the entire entrance point and, with the help of the frame, keeps the draft to a minimum within the coop.
Because I decided on a vertical sliding design, the height of the door could be extended to help with the drafting. The frame would hug the door to the sides and the bottom, so making the door 24″ tall gave more material above the 12″ opening — I’m not sure it makes that big a difference versus having just a few inches, but it’s still lightweight and was worth the effort (I had the material anyway).
I used 1x4s to build the majority of the frame. With the door being 12 1/4″ and the 1x4s being 3 1/2″ each, the exterior width of the frame would be 19 1/4″.
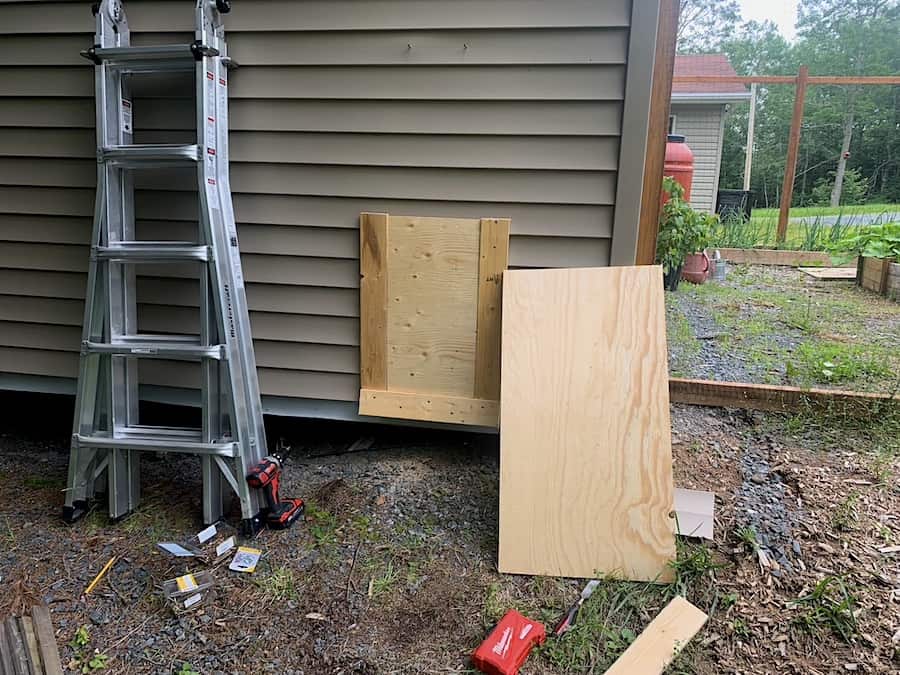
The first step in my process was to screw a 2×4 base into the exterior side of the building to act as the bottom stop for the door (and a tie-in point for the ramp). I cut the 2×4 to 19 1/4″, centred it at the bottom of the door, and screwed it into the side of the building, aiming to tie it into the bottom of the frame on the other side of the plywood.
Once in place, I set my first two 1x4s to the outer edges of the 2×4. I had cut an 8′ run of 1×4 into equal 24″ lengths. Because the cuts were made at 90° and the 2×4 base was horizontal, I felt comfortable simply lining the two 1x4s to either side of the plywood door to position them. I left the slightest gap between these pieces to allow for easier opening (I did this job in July, so we were pretty well at peak humidity for the year, so a small gap would almost certainly ensure the door would open well year-round).
In my case, I actually set the ramp onto the 2×4 base and screwed it into place before moving onto the two 1x4s into place. However, whether I installed the ramp or not, I would soon move on to the second pair of 1x4s that would act to hold the door in place and keep it from falling away from the building.
This meant offsetting the new 1x4s (also 24″ tall) 1 1/2″ toward the interior, just in front of the first pair. This offset would allow me to screw the new 1x4s through the previous ones and into the wall. The resulting 1 1/2″ interior offset would keep the door securely in place when shut.
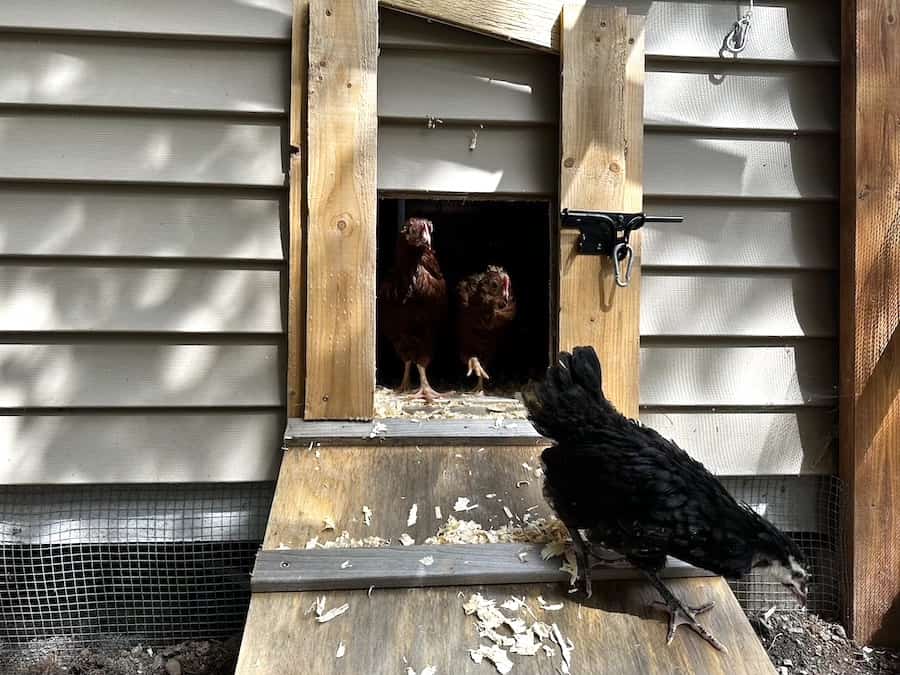
This next picture is from the finished project, but I added it to show how the slot works:
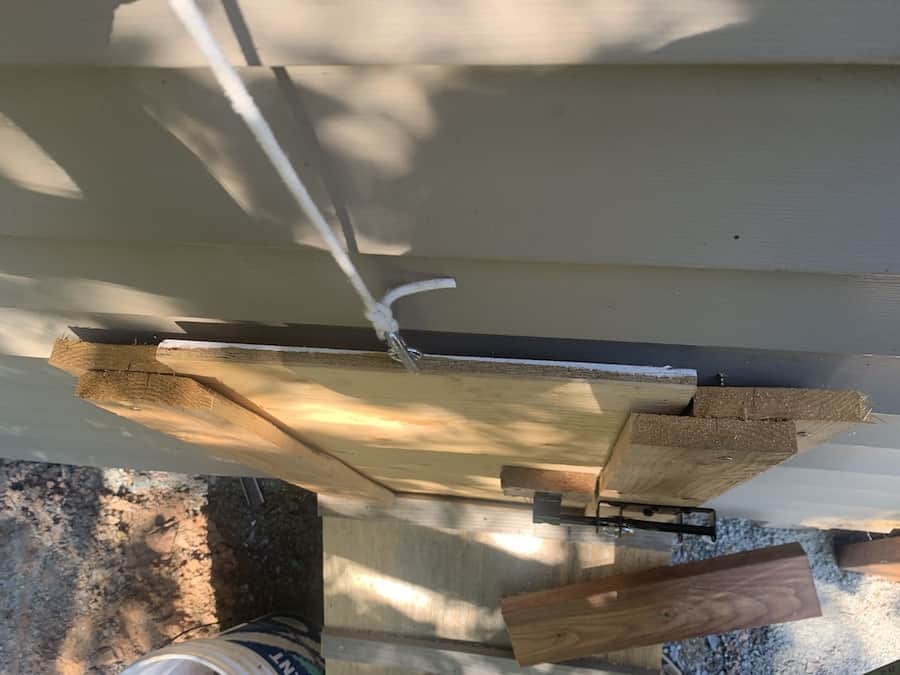
You can see from the picture above that I installed an eye hook into the top of the door. From there, I screwed in another eye hook a few feet above it, a third to the right of the second, and a final one a few feet below the third.
I measured a length of rope that would effectively span from the last eye hook to the top of the door when the door was fully open and tied a carabiner to either end of the rope.
The opening mechanism is fairly simple. Pull the rope from the loose carabiner downward and attach it to the fourth eye hook. To close the door, simply unhook the carabiner from the fourth eye hook, allowing the weight of the door to shut itself. I like to attach the carabiner to the third eye hook when the door is closed to help keep it from swinging.
As a safety, I screwed two “stopping screws” into the side of the building less than 24″ above the top of the door to ensure the door would be pulled out of the frame. As the door is pulled open past the top of the opening, it will hit the stopping screws well before it’s pulled out of the frame.
Here’s a photo showing the opening mechanism and further clarification on the eye hook numbers:
- First eye hook: bottom left
- Second eye hook: top left
- Third eye hook: top right
- Fourth eye hook: bottom right

Admittedly, this came as an afterthought, but as I was thinking about predator-proofing the coop, I thought of how crafty raccoons can be. If they could break into the eventual run, they’d likely be able to hoist up the chicken door and get in.
Therefore, I felt the need to add a latch, so I used the one I had purchased for the eventual run door and installed it on the chicken door. Unfortunately, my lack of foresight meant the latch would have to be installed on the outside, so I had to add a lock to it as well in order to keep raccoons from simply sliding it open. I reckon a carabiner should do the job rather than having to put a padlock on the door.
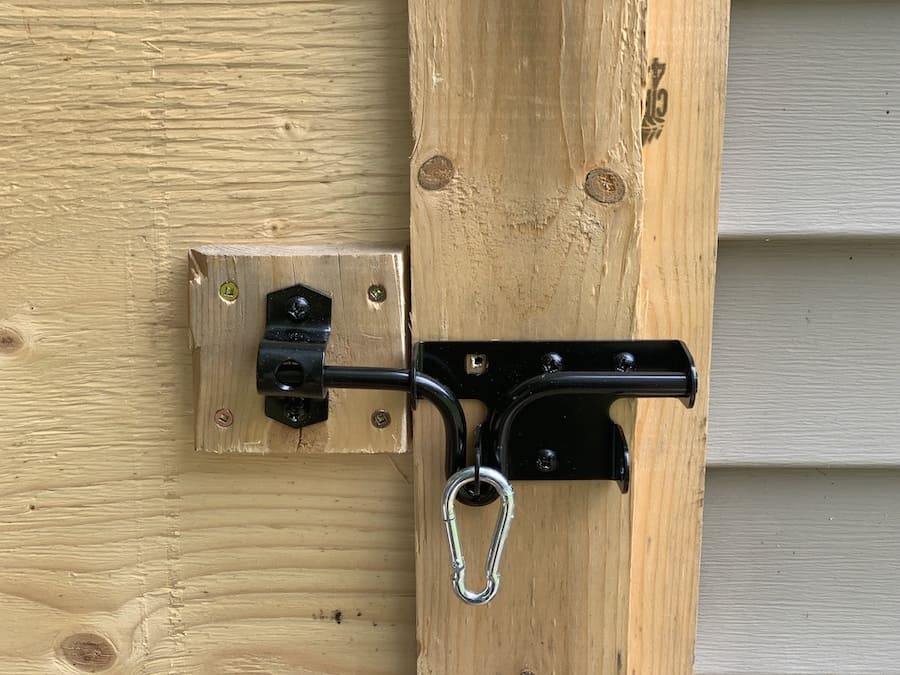
And so, my original plan of being able to open the door from the inside or outside didn’t come to fruition, but only being able to open it from the outside really isn’t a big deal to us.
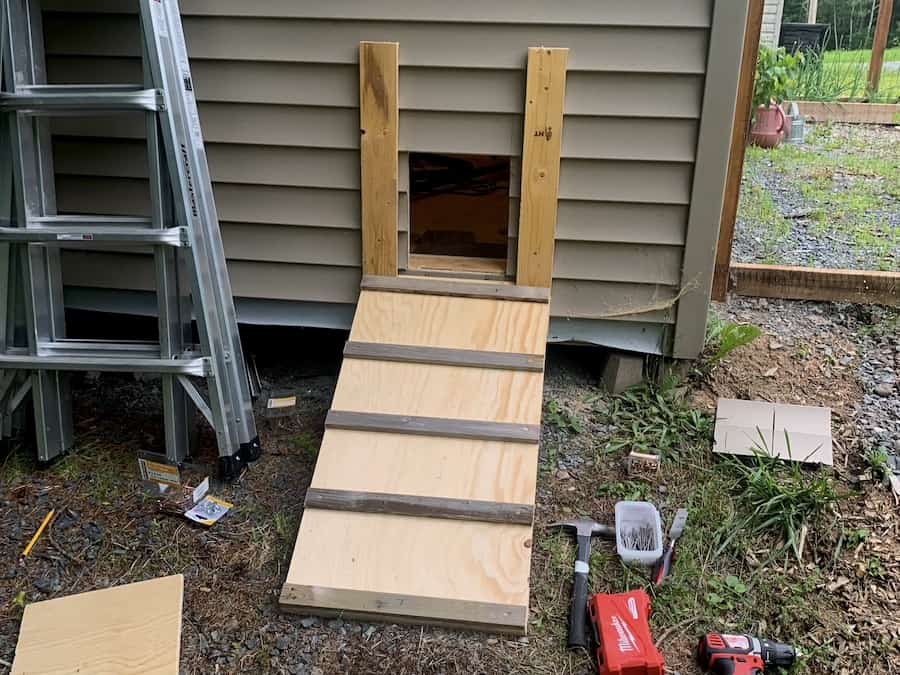
Installing A Chicken Ramp
As I mentioned, I built the ramp while also building the door, starting just after installing the 2×4 base and before screwing in the first vertical 1x4s for the door frame.
The ramp was just as wide as the frame (19 1/4″), and I cut it 35″ long to help bridge the roughly 21″ difference between the bottom of the ramp and the bottom of the entrance.
I cut a scrap piece of 1×3 to 19 1/4″ and screwed it flush to the bottom of the ramp. This will help keep the bottom of the plywood from weathering as fast — it’s easier to replace a scrap piece of 1×3 footing than the entire ramp.
And perhaps more importantly, I cut some scrap 1×2 (from the garden fence the previous homeowners had built) into 5 19 1/4″ strips to act as “stairs” to help the chickens get up the ramp easier. You can see the point at which I finished the ramp below:
So there you have it! This is what I did to install a chicken door in our shed-turned-coop. As I stated earlier, it’s certainly not the only way to do it, but I figured I’d share this with you in the hopes that it can help you install a door in your coop. Best of luck building yours!